This is the second post in a multi-post tutorial on how to get started SUP river surfing. Checkout the other posts as well:
- Part 1: The Gear
- Part 2: Scoping out the wave
- Part 3: Plotting a course onto the wave
- Part 4: Padding stances to catch the wave
- Part 5: Paddle strokes to catch the wave
- Part 6: Stances and footwork for surfing the wave
- Part 7: Paddle strokes and braces for surfing the wave
Finding a river with waves
Now that you have all the gear, it’s time to start looking for a river wave to surf. Great places to check out are kayak/white water parks. These will have man made holes and waves that will often be surfable from low to high water. If you see kayakers surfing these holes, there’s a good chance they can be SUP surfed as well.
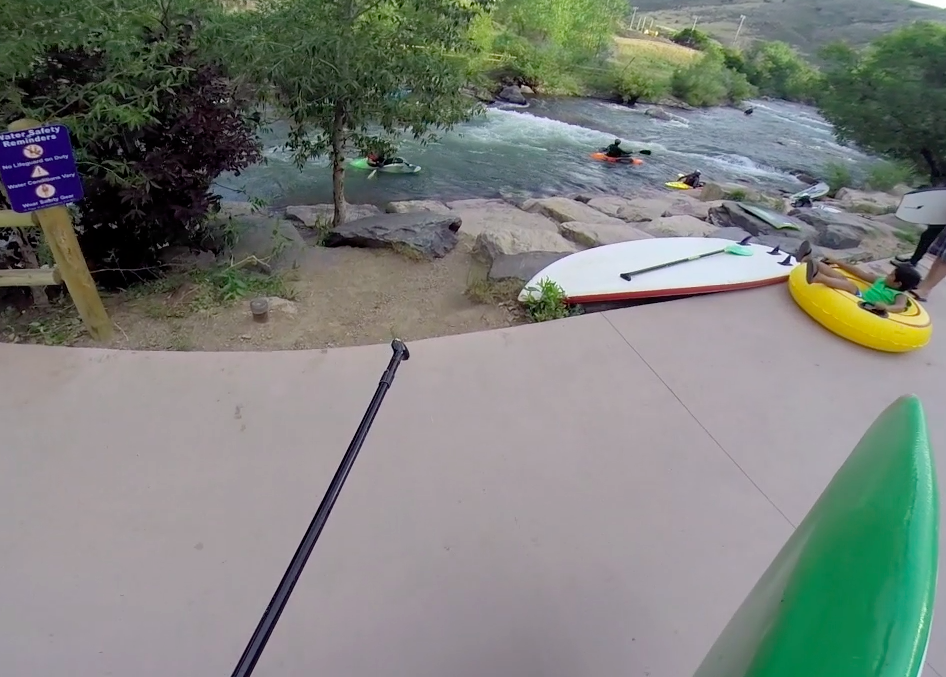
the white water park in Golden, CO filled with kayakers, tubers, and SUPers
Another good resource is a local white water, kayak, or SUP shop. The employees there should be able to direct you to a stretch of river that has places to surf. If that doesn’t pan out, there are many resources online that will help point you in the direction of a nearby white water park.
Picking the best wave
Most areas will have multiple surfable waves and holes to choose from all within walking distance of each other. It’s a good idea to take a look at each wave every time you go surfing. The flow of most rivers will change daily, and the waves will change with them. I like to walk the stretch of river and check out all the waves before a session.
There are three main characteristics I look for in a wave: safe, surfable, and easy entry.
Choosing a safe wave
The first question I ask myself: is the wave safe? How much distance downstream of the wave before the next wave, rapid, dam, waterfall, etc? How fast is the water moving? If you fall, how much time/distance do you have to swim to shore? Are there any rocks or logs immediately downstream?
Especially when first learning, it’s nice to have a safe wave. In Pueblo, Colorado there’s a white water park that has nice waves with huge pools of slow moving water for 100 yards after each wave. This is a perfect area to learn. It’s not often you find something as ideal as Pueblo, but looking for safe waves is always a good idea.
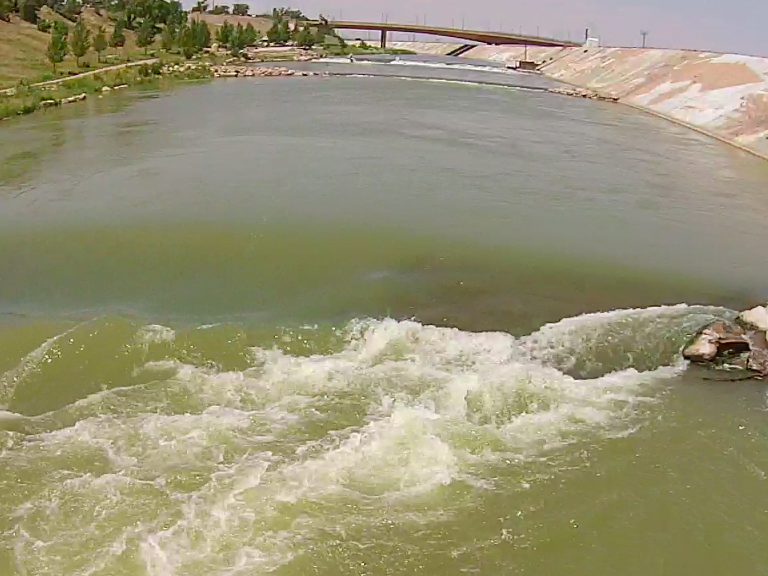
the top three waves at Pueblo, Colorado’s white water park
Another characteristic of a safe wave is measured by the direction of the water flow immediately downstream of the wave. If the water after the wave is flowing DOWNstream, then the wave is safe. If there is a lot of turbulent white water directly downstream of wave that is flowing UPstream, then the wave is sticky and will attempt to recirculate you (pull you back into the wave, and potentially pull you under water). A couple feet of upstream white water flow is ok, but if the wave has more than 4 feet of frothy, foaming, white water flowing upstream it could be dangerous.
Choosing a surfable wave
Most waves are surfable using the right board. I find small, sticky holes tend to be the easiest to surf and are surfable on the widest variety of boards. These holes will have a shin to knee high foam pile after the river goes down a small drop. Ideally the drop will be slight, with a low incline, so that your board fits on the wave without pearling (the nose of the board going under water).
Waves and holes that form a U shape or a smile shape, where the bottom of the U is the most downstream point of the wave, tend to be easier to surf. Another way to identify these waves is to imagine looking at the wave from above the river and slightly downstream. If the wave makes a smile shape then it’s good to go. If it makes a frown, then the wave will try to spit you off the sides.
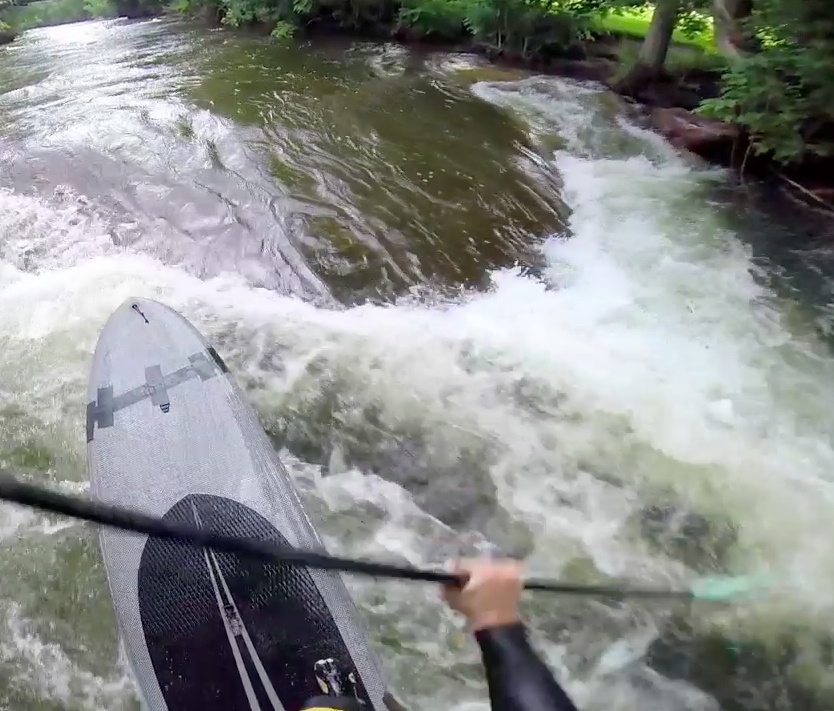
a “smiling” wave on Boulder Creek
Choosing a wave with an easy entry
The final thing to look for in a wave, is an easy entry/approach onto the wave. The best waves will have a large eddy. An eddy is a portion of the river that is not flowing as fast as the main current, or often will be flowing up stream. Eddies will be calm, and often appear on either side of the wave near the banks of the river. Without at least one eddy, the wave can be much more difficult to paddle onto.
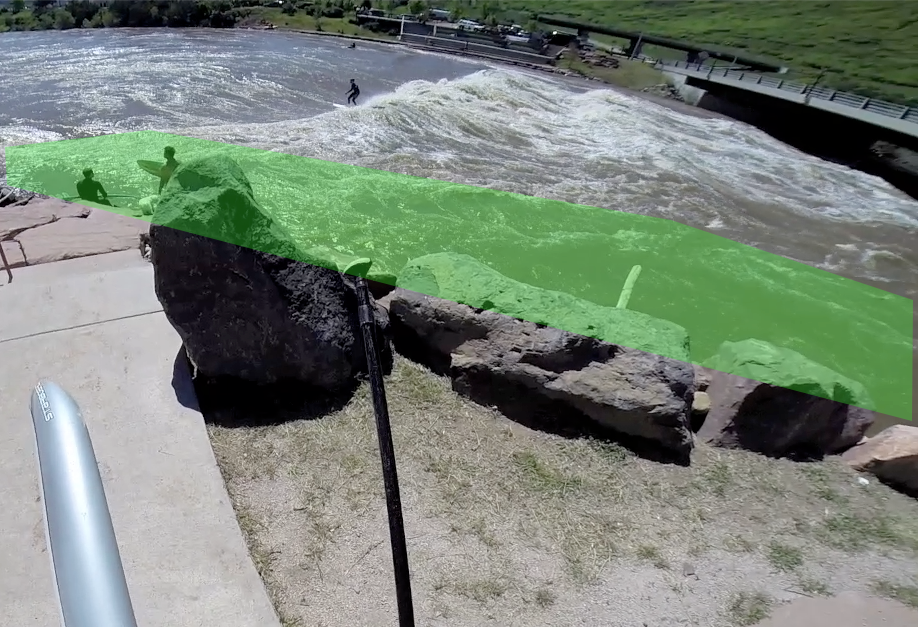
the eddy at the Glenwood wave highlighted in green
Identify which eddy you will use to paddle onto the wave. The eddy should be fairly calm, free of obstacles, deep enough to paddle your board through, and offer a clear shot to one side of the wave.
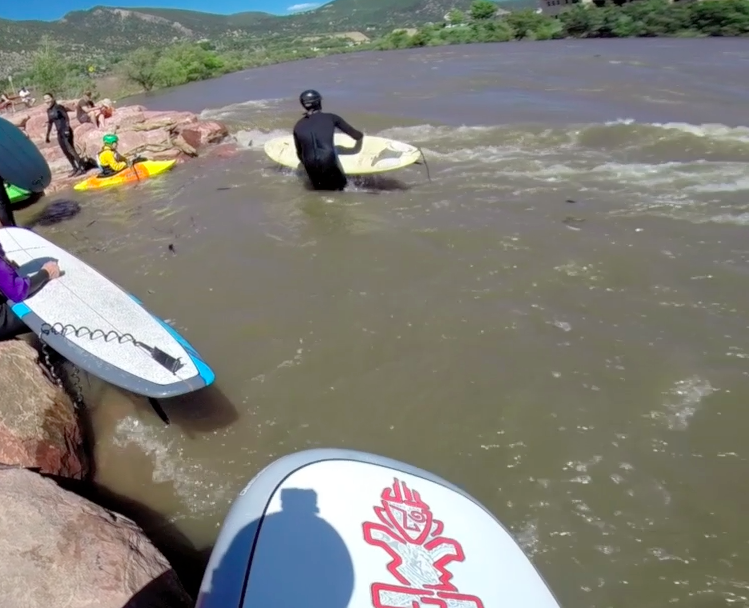
the eddy at Glenwood, offering an easy to paddle path onto the wave
Once you’ve found a wave that is safe and surfable, and you’ve identified an eddy you can use to paddle onto the wave, you’re ready to start surfing. In the next post I’ll start talking about techniques for paddling from the eddy onto the face of the wave!
Click here to read Part 3: plotting a course onto the wave.


Tez
December 10, 2014 at 3:12 pm
Great post Ben, with some great info – keep ’em coming!
benjamin.lee.smith@gmail.com
December 10, 2014 at 4:40 pm
Thanks!